


Overview
Introduction
Super Product Swatches for WooCommerce
Elegant and Fully Customizable Product Color Swatches for Your WooCommerce Website
By: Joe Iz
Demo Link: https://superstorefinder.net/superproductswatches/
Support: http://superstorefinder.net/support
With Super Product Swatches, you can create elegant and fully customizable color swatches for your products with different variant colors, labels and images (design, texture, etc.) The plugin basically replaces the regular drop-down menu for your color selector into elegant color swatches. There are several styles that you can choose from to best fit your online store image.
The plugin is a must have if you’re selling clothing, accessories, electronics and many more products online.
Installation
WordPress Installation
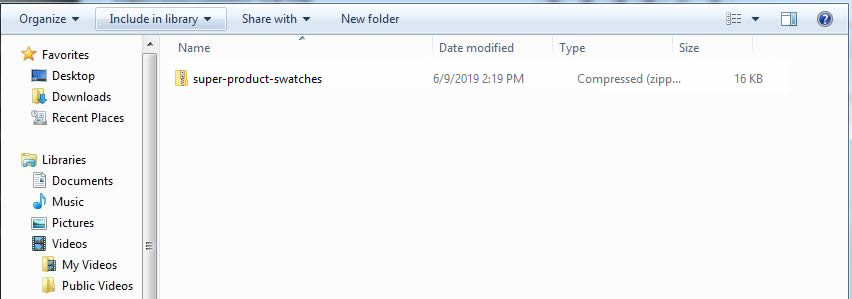
Ensure that you have WooCommerce Plugin installed first, then go ahead and download the Super Product Swatches plugin from Codecanyon. Within the download package, you’ll find the follow file structure and contents.
super-product-swatches.zip
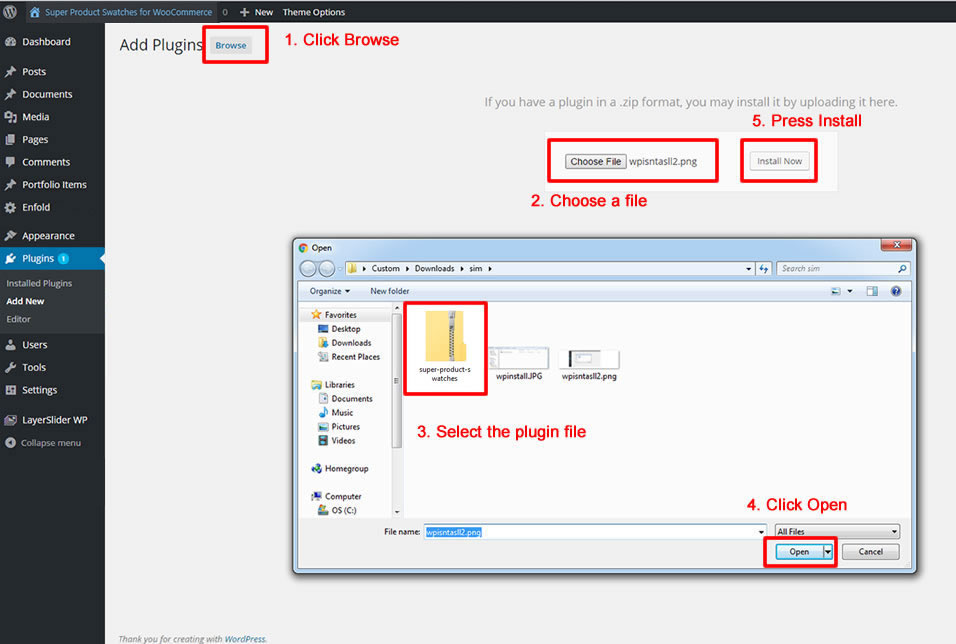
1. Go to Plugins > Add New
2. Under Upload, click Browse, locate super-product-swatches.zip in your plugin
download package and click Open.
3. Find the WordPress Plugin you wish to install.
4. Click Install Now to install the WordPress Plugin.
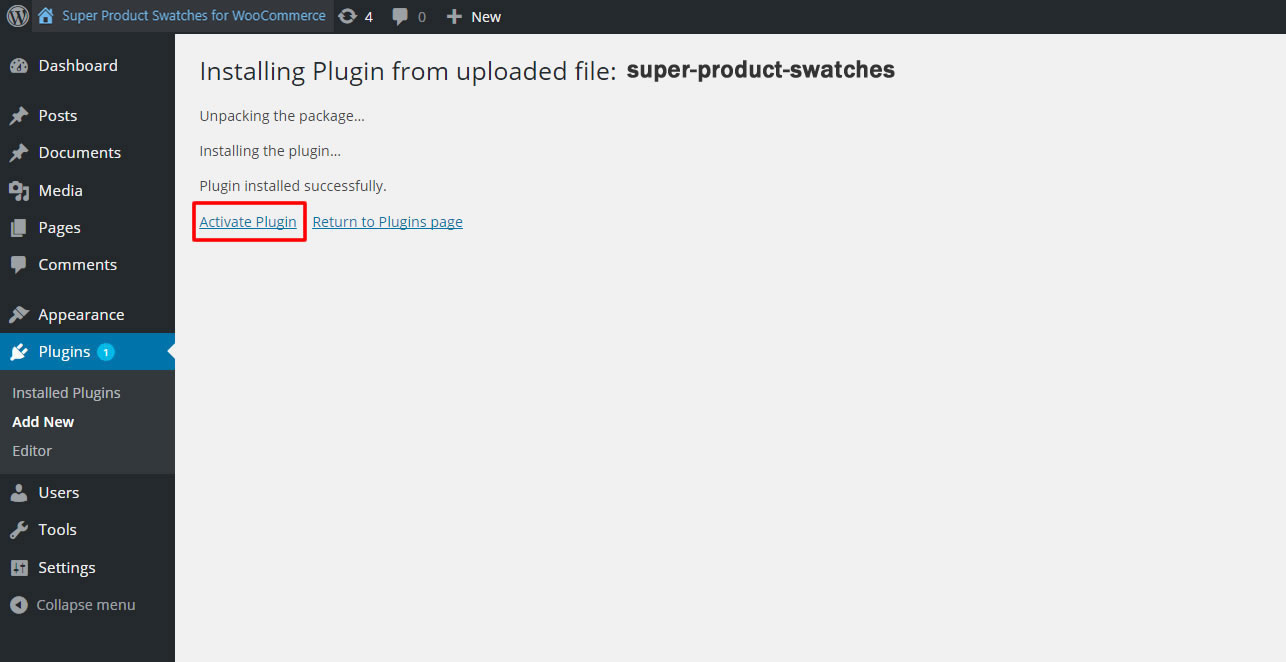
5. A popup window will ask you to confirm your wish to install the Plugin.
6. If this is the first time you’ve installed a WordPress Plugin, you may need
to enter the FTP login credential information. If you’ve installed a Plugin
before, it will still have the login information. This information is available
through your web server host.
7. Click Proceed to continue with the installation. The resulting installation
screen will list the installation as successful or note any problems during
the install.
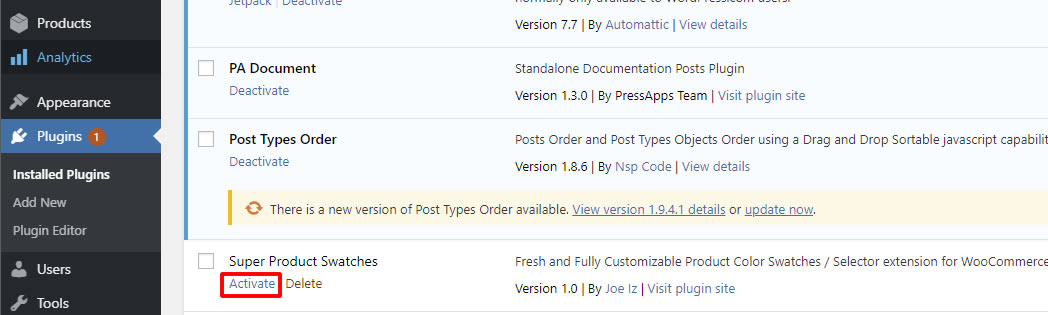
8. If successful, click Activate Plugin to activate it.
FTP Installation
1. Using a FTP program, upload the plugin folder super-product-swatches located in
your plugin download package folder.
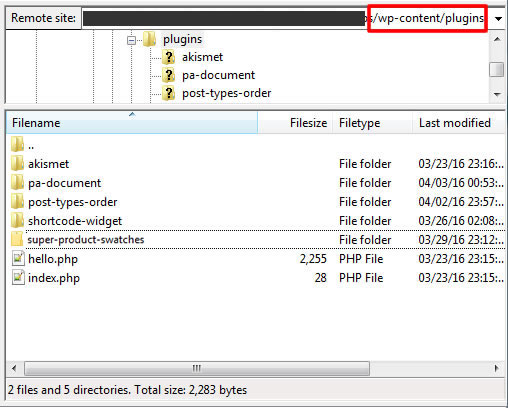
2. Go to Plugins screen find the newly uploaded Super Products Swatches plugin
in the list.
3. Click Activate Plugin to activate it.
Creating Swatches
Setting Up Product Attributes
First of all, before you start, you will need setup attributes and products for your e-commerce website, you can refer to WooCoomerce Comprehensive Installation and Setting up Guide here.
This part of the user guide will guide you on how to create your attributes (i.e colors, image, labels)
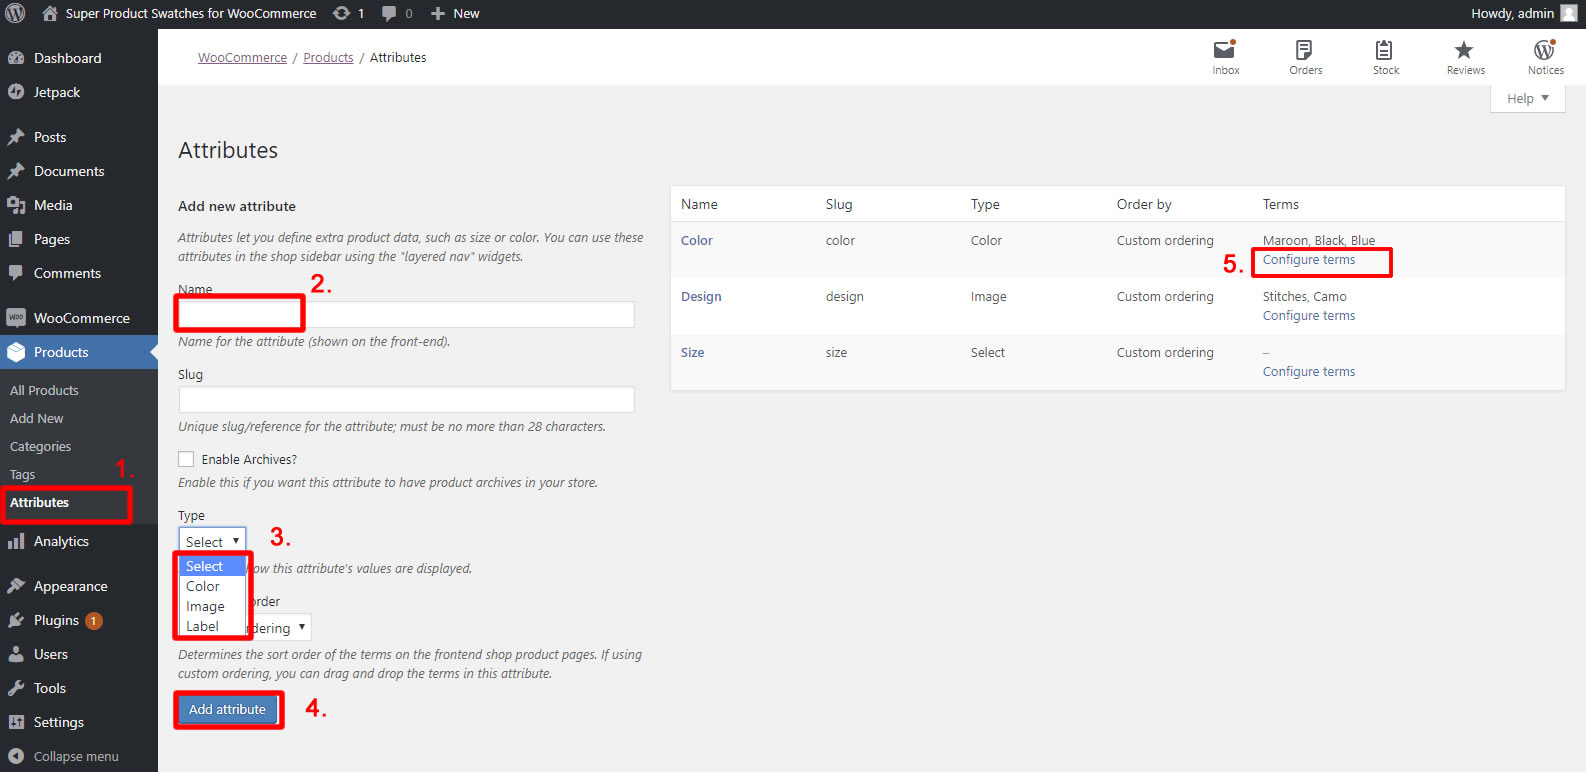
1. Click on Products > Attributes
2. Enter your attribute Name (i.e Color)
3. Choose the Type of attributes (if you choose color, you can choose color from color palette, if you choose image, you’ll be able to upload the texture/design image of a particular product variation).
4. Once done, click on Add Attribute.
5. You will see that your new Color Attribute will appear on the right table list, click on Configure Terms to start configuring individual colors for your products.

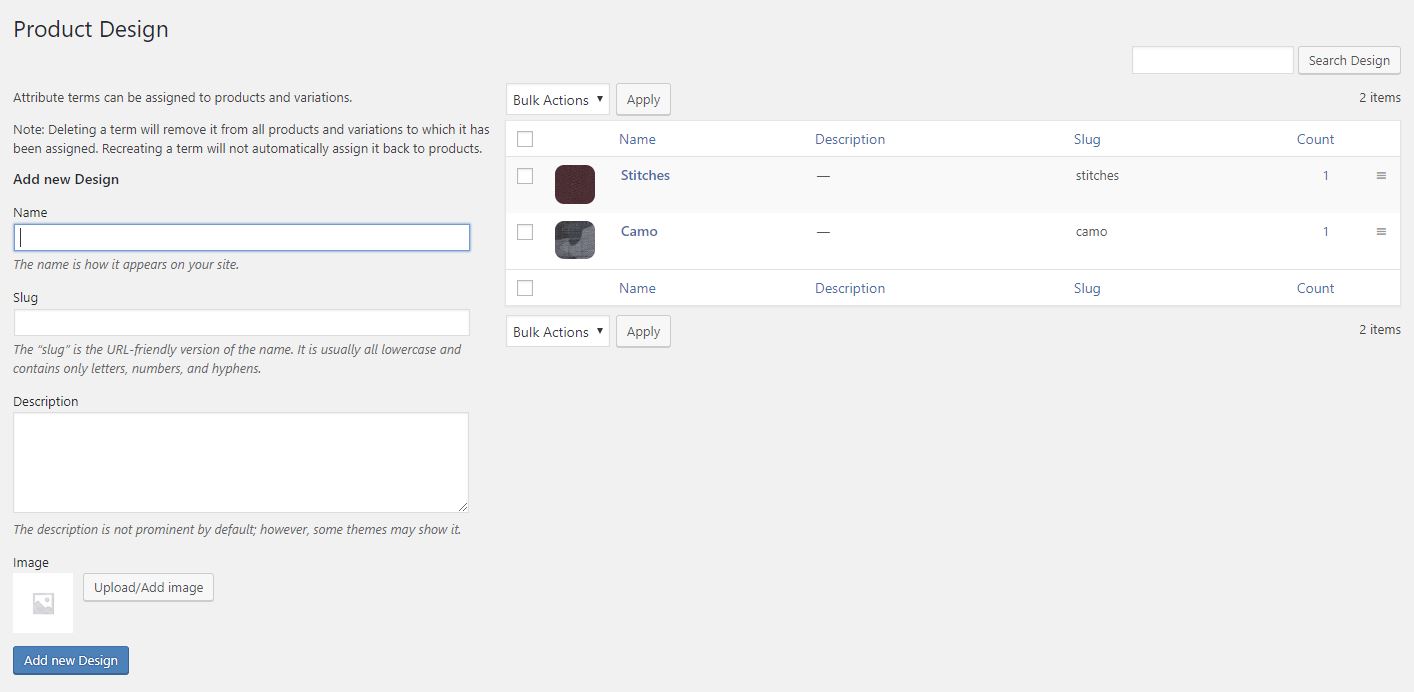
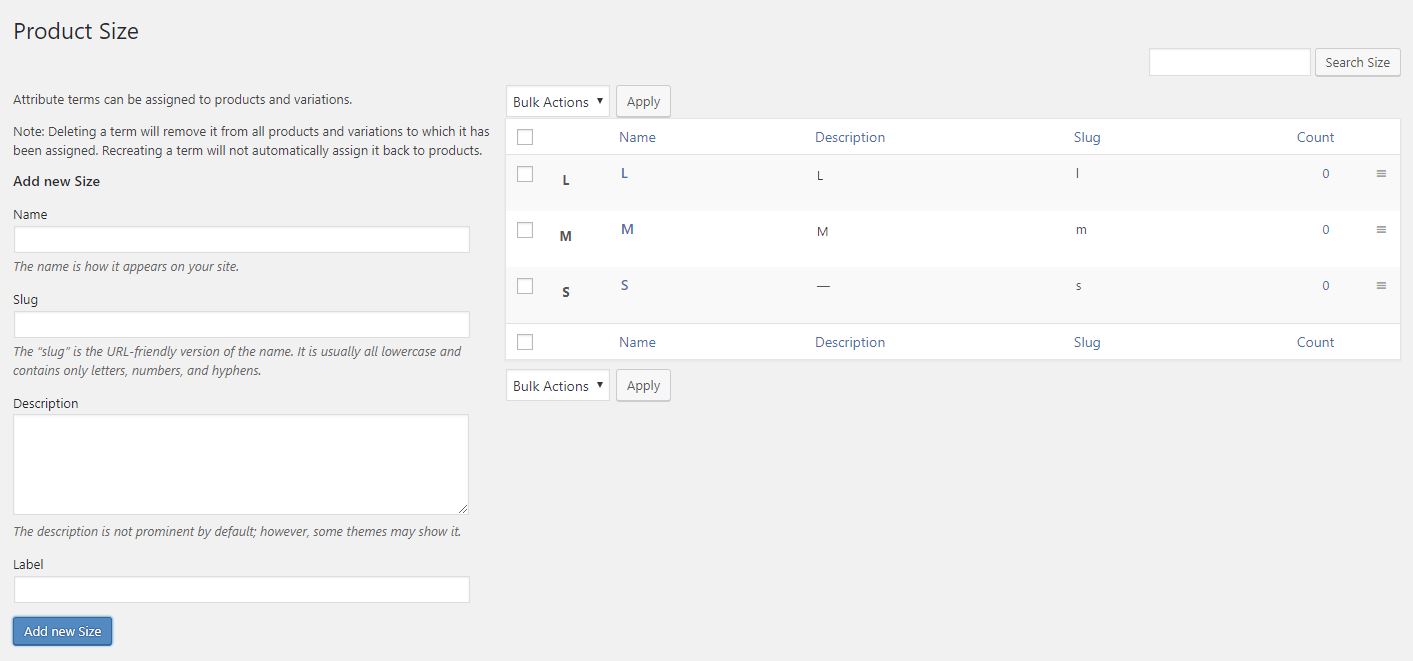
6. Once you’ve clicked Configure Terms, you can manage your colors here, to add a new color, enter the color Name and details
7. Select the Color from the color pallete
8. Click on the Add new color button
9. Your new color will appear on the table list to the right
10. You can edit/delete any colors by hovering on the color name and click Edit/Delete.
Important Notice: You can add colors on-the-go while adding products in WooCommerce, refer to this user guide section for more info.
11. For Image Attribute, when creating an attribute in step 3, choose Image, and you will be able to upload Images for your Product Variation as screenshot below
12. For Label Attribute, when creating an attribute in step 3, choose Label, and you will be able to enter label for your Product Variation as screenshot below
Creating a Product with WooCommerce
You’ve got all the attributes setup and done, now it’s time to create a new product using WooCommerce, for detailed in-depth guide, you can refer to the WooCommerce Official Guide.
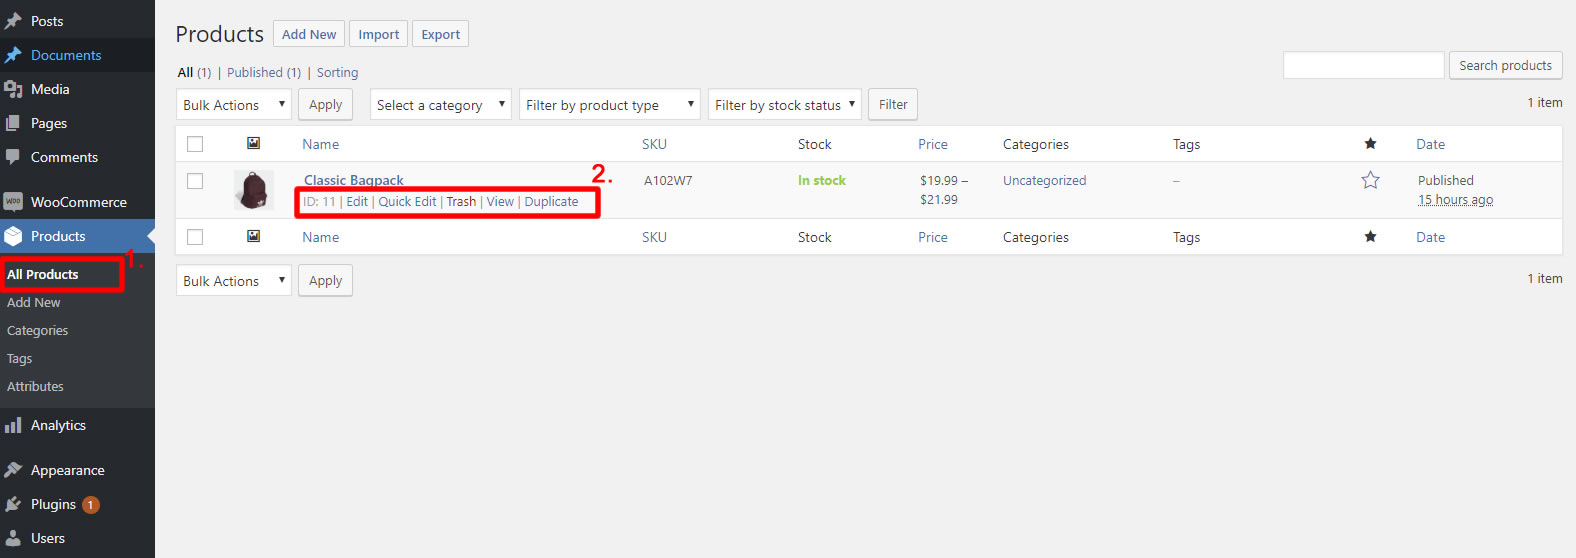
1. Firstly, you can see all of your products by clicking Products > All Products
2. By simply hovering your mouse on any product, you can Edit, Delete or Duplicate that particular product.
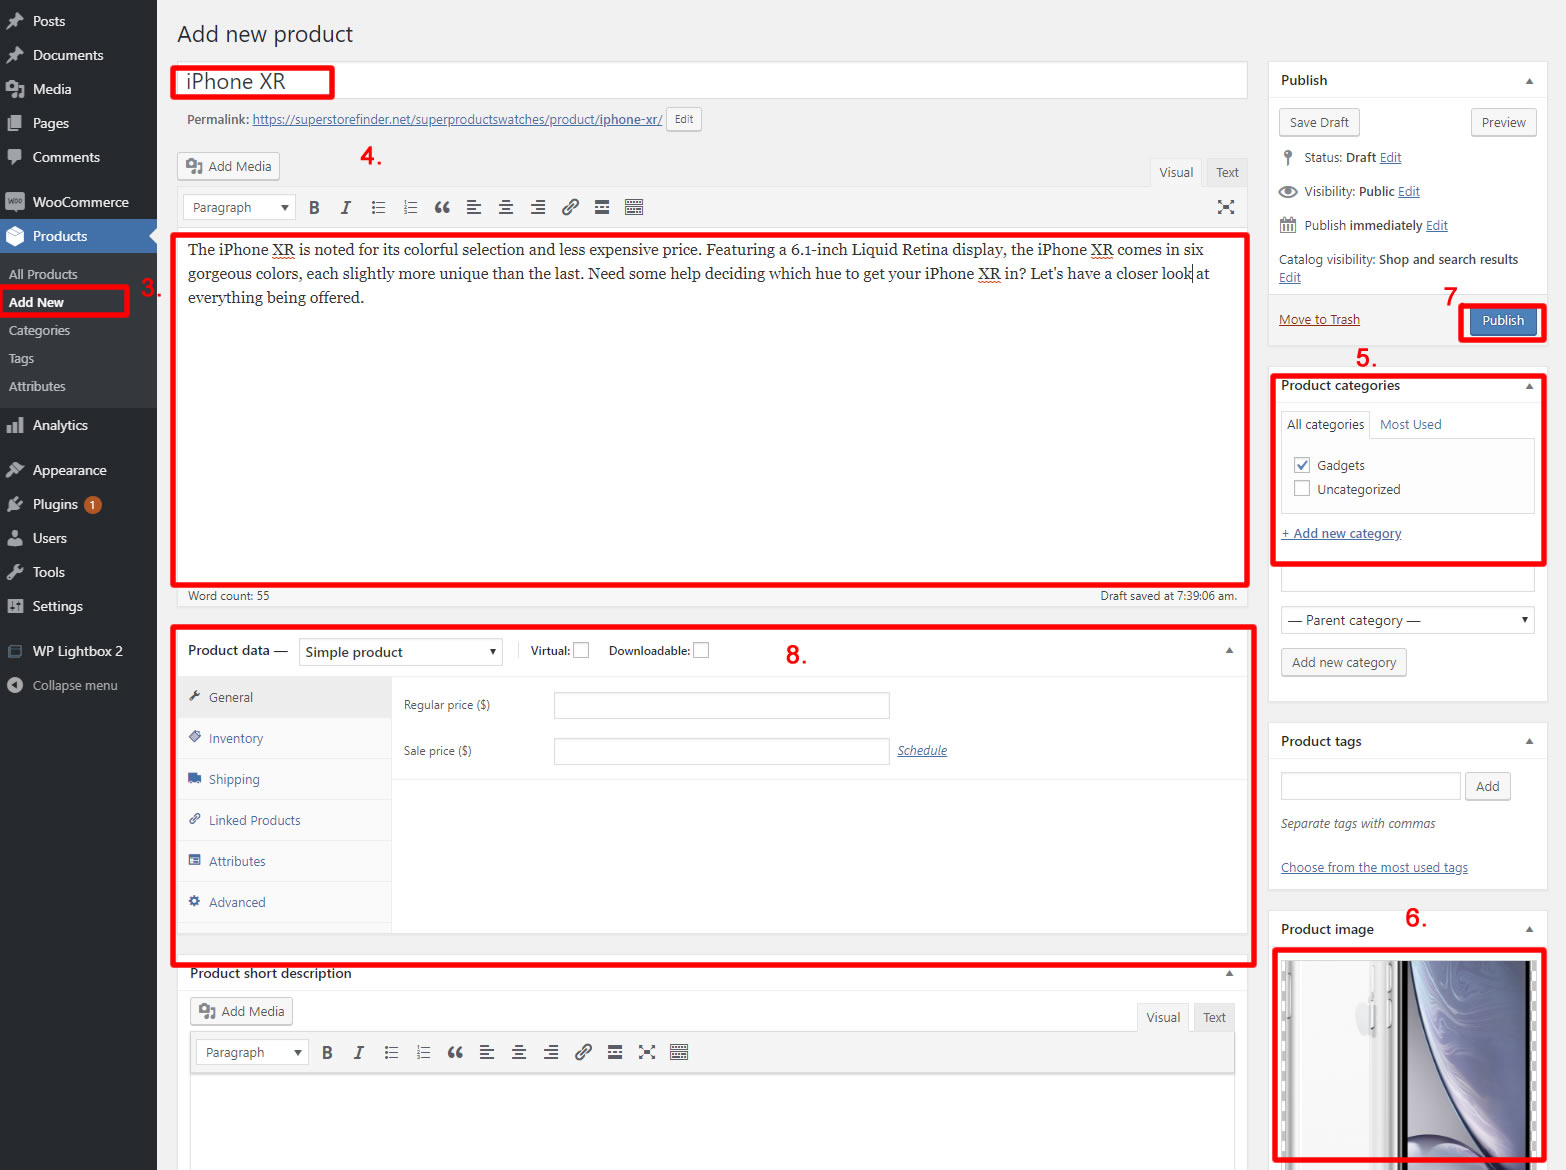
3. To create a new product, click on Products > Add New
4. Enter Product Title and details
5. Assign category for your product
6. Upload a feature Product Image
7. Publish your product first, just in case, so you won’t lose your changes.
8. Once published, we can focus on the Product Data and WooCommerce settings next.
Setting Up Product Swatches (Color, Image, Label)
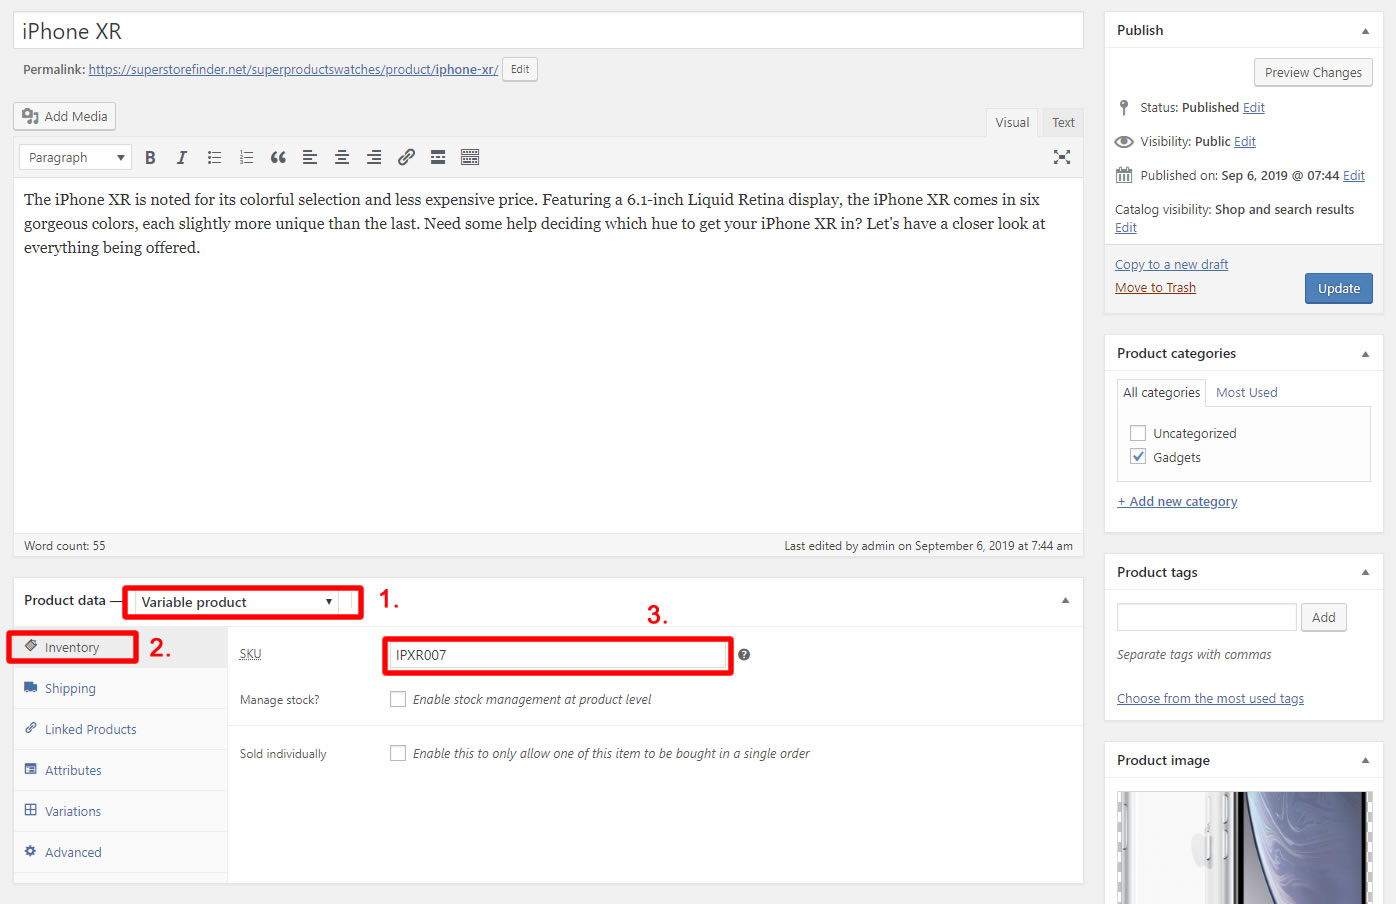
1. For your Product data, select Variable product
2. Click on Inventory Tab
3. Enter your SKU and other settings if required
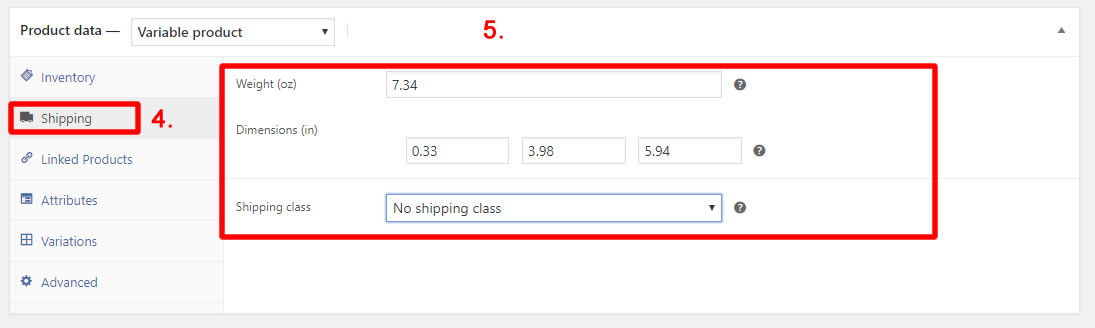
4. Click on Shipping Tab
5. Enter your product Shipping Details (i.e weight, dimension, shipping class)

6. Click on Attributes Tab
7. Choose Your Custom Product Attribute (color, image or label) and press the Add button (In this case, we use Color)
8. Choose a list from available Color Attributes or you can press on the Add New button to add Color, Image, Label on-the-go.
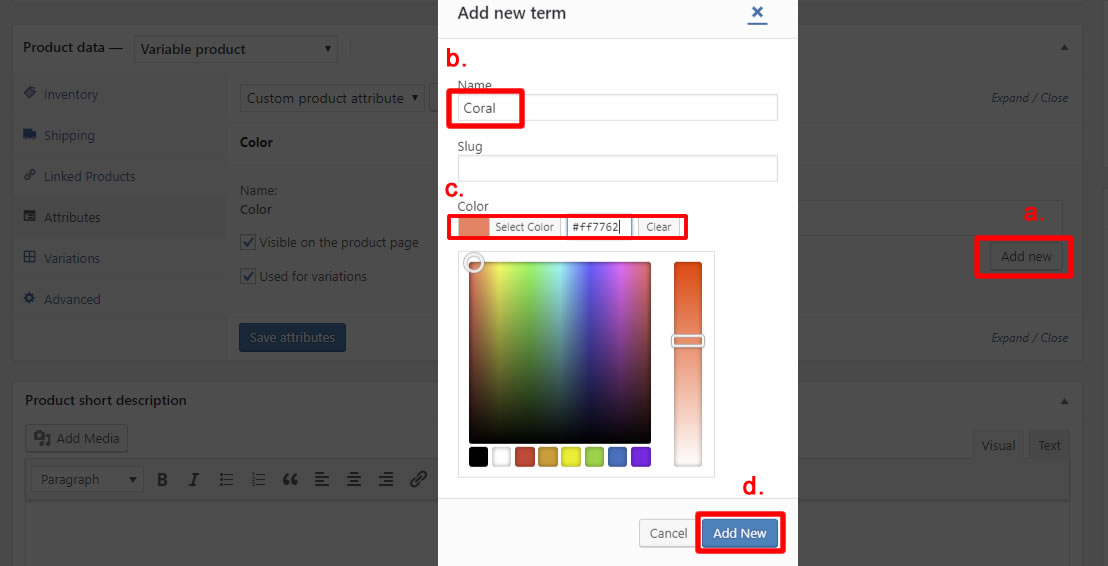
To add terms on the go (color, image or label), follow steps below
a. Click on Add New button in Attributes Tab (after choosing Custom Product Attribute either for Color, Image or Label)
b. Enter your Term name
c. Select Your Term Color, Image or Label
d. Click on the Add New button
9. Tick the Used for Variation
10. Click on the Save attributes button and don’t forget to Update and save your Product.
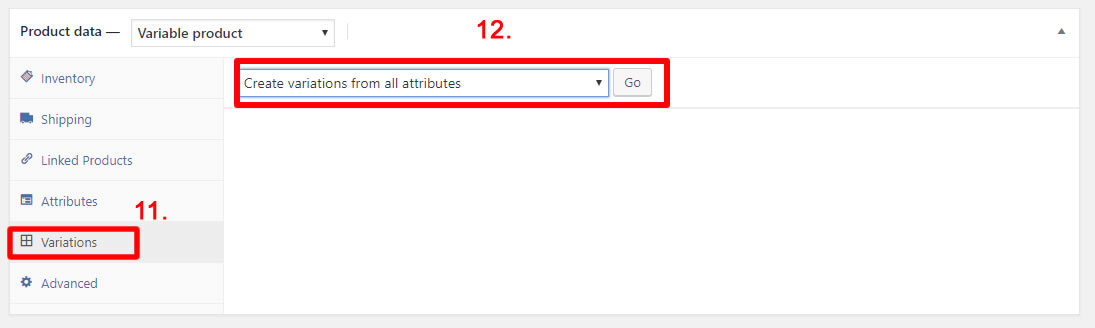
11. Here’s where the step that you’re almost can get your color swatches to be shown at frontend, Click on Variations Tab
12. Choose Create variations from all attributes and click Go
* You will see that your variations will be generated as below
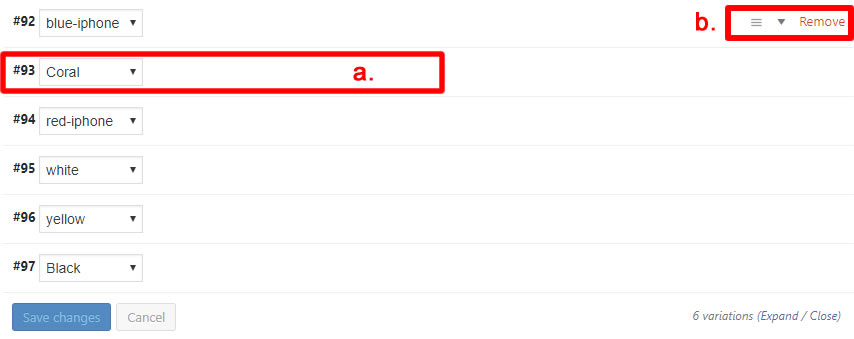
a. You can click on a variation to edit a particular variation
b. Hovering a variation will allow you to reorder (3 lines hamburger icon) or remove the variation
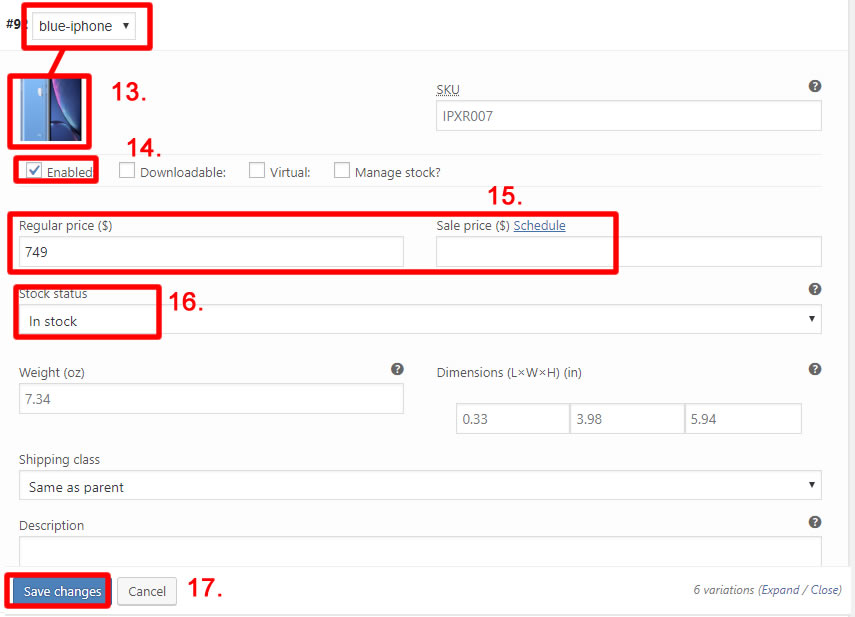
13. Upload an image that match the color/image/label of your Product Variation (i.e Blue iPhone)
14. Ensure that this variation is Enabled in order to be shown to public
15. Set the Prices
16. Set Stock Status
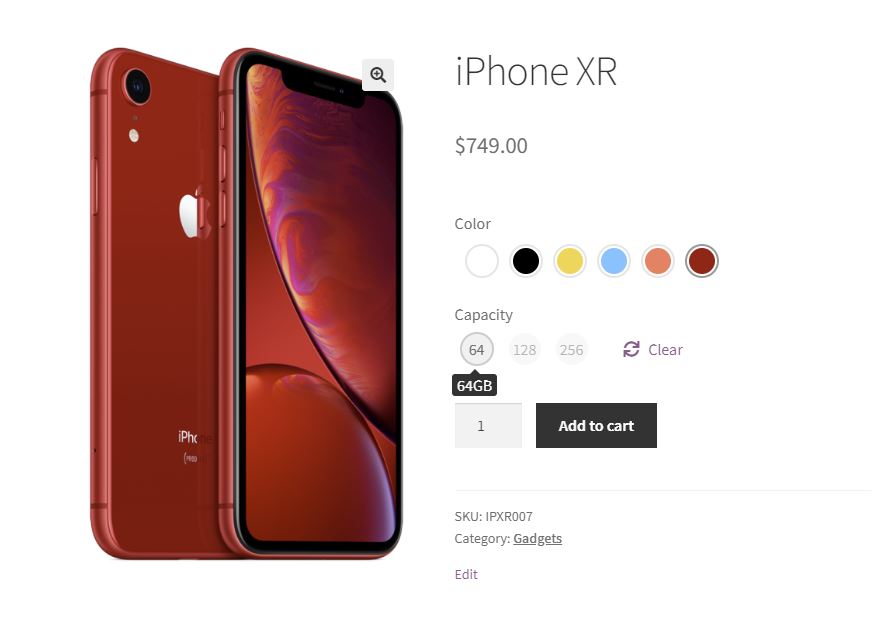
17. Press Save changes, and your done! Now, finally your Product Swatches will appear at fronted as illustrated below.

Setting Up Multiple Variations on a Single Product
You can setup more than 1 variations for your product, in this example, we’ll be showing you from previous section, we’ve added Color Variation for a product. Now, on top of that, we’re going to add Capacity (Label) variation
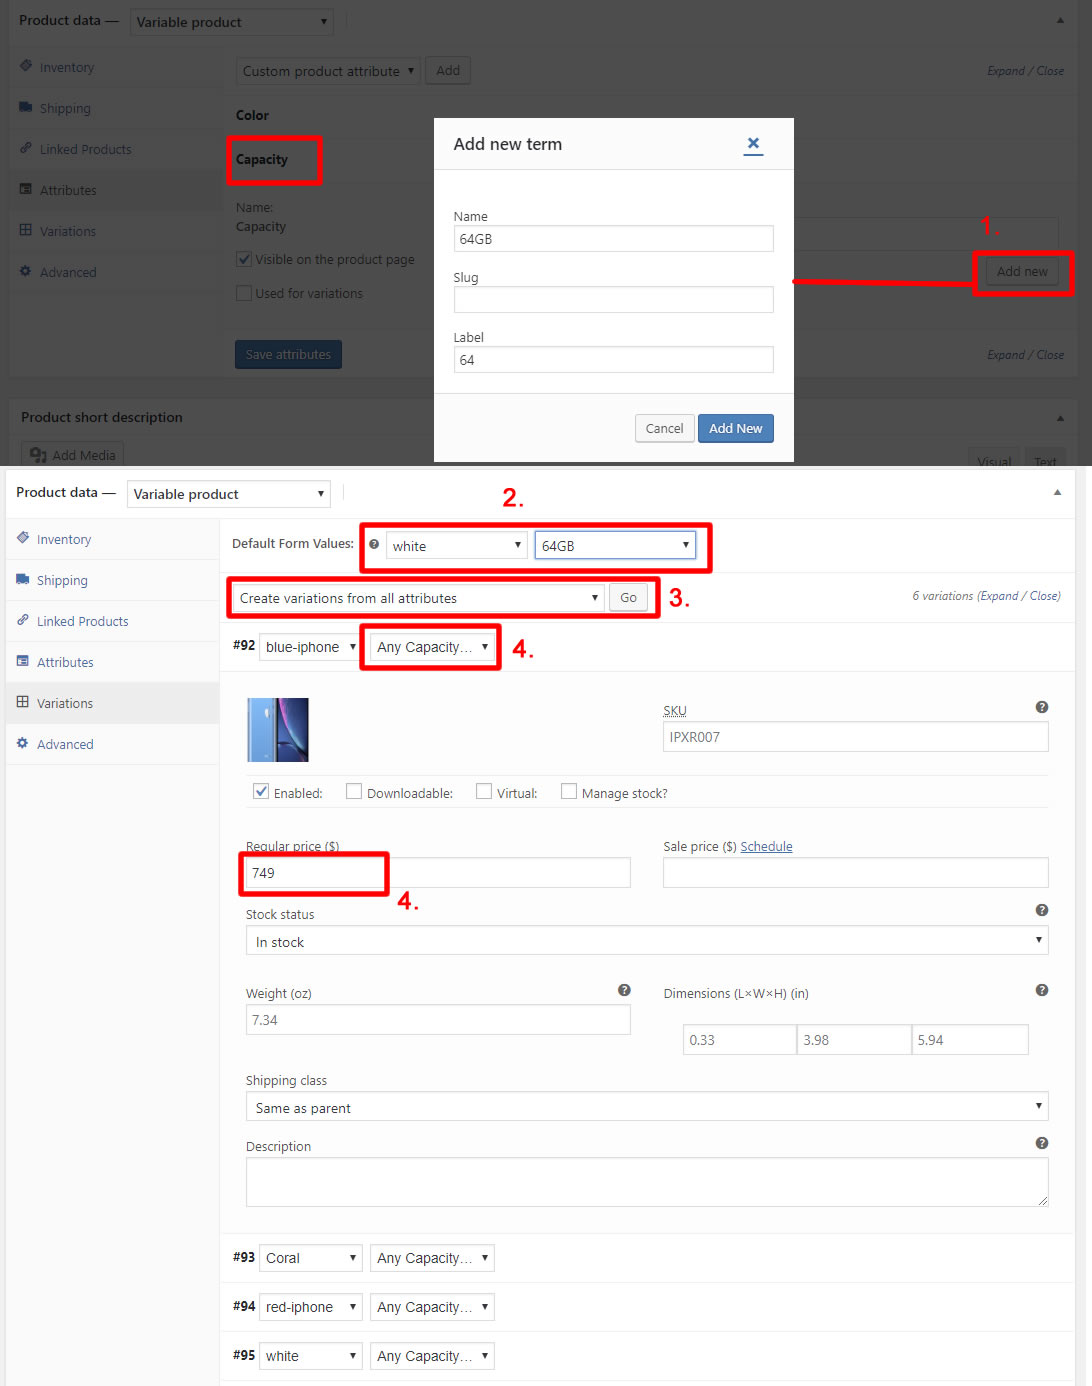
1. Under Attributes Tab, under Capacity term, click on Add new and create all the capacity variations.
2. You can select default values when the product page loads, in this example it’s white color and 64GB.
3. You have the option to create all variation again and Press go, so you can assign new prices for product with higher capacity
4. Se the Capacity and Prices and click on Save Changes
Alternative Solution to Multi-Colored Product Variations
For multi-colored product variations, a solution would be to use Image Swatches and upload images representing the colors of your product as sample below. (You can right-click and save images below and perform edits to create your own variation templates)
![]()
![]()
![]()
![]()
The result would be something similar to this demo link here.

Settings
Configuring Settings
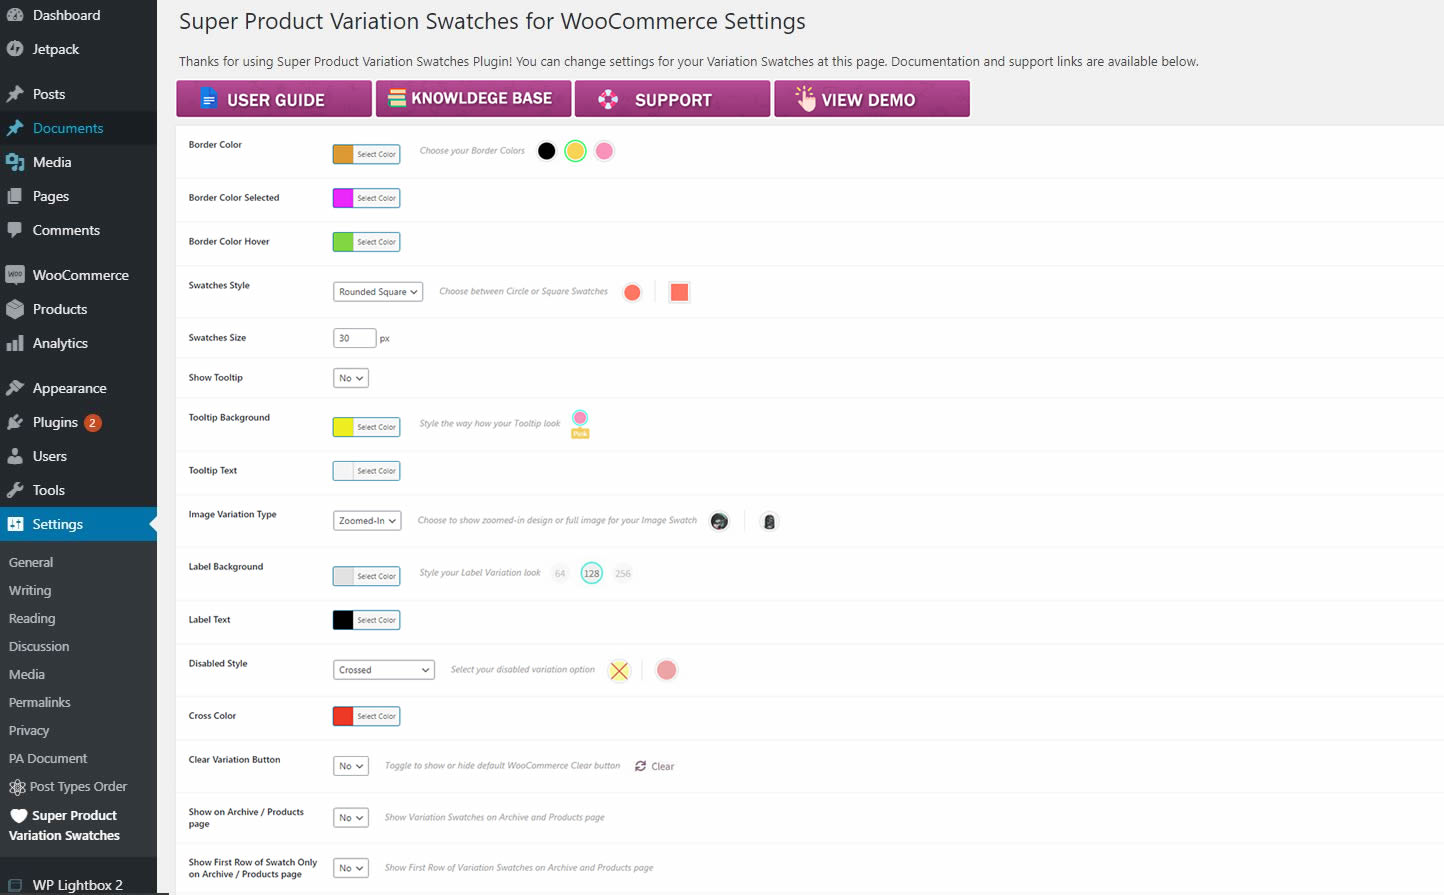
From WP admin, click on Settings > Super Product Variation Swatches
* In version 2.2, you can choose to show text next to you Image Swatches as per setting below (This option will only valid for Image Swatches)

The settings are pretty much self-explanatory with description and image guide on the right hand side. Once you’ve selected your desired settings, click on the Save Changes button.
1. Borders
You can change the Border Color and Border Color selected
![]()
2. Swatches Style and Size
You can choose between Circle, Square or Rounded-Square Swatches Styles. You can set the Swatches size here too.
![]()
3. Tooltips
You can change the background and text color of your Tooltip
![]()
You can also have the option to show/hide Tooltips

4. Image Variation Type
You can decide to show zoomed-in texture image or the full image for your Image Swatches
![]()
5. Image Variation Show Text
You can decide to show text next to your image for your Image Swatches
![]()
6. Labels
You can change the background and text color of your Label Swatches
![]()
7. Clear Variation Button
You can choose to show/hide the default WooCommerce Clear Variation button
![]()
8. Disabled Variation
You can customize your disabled variation swatches including crossed, dimmed and none.
![]()
9. Show on Archive / Products listing page
There’s an option that will allow you to show Variation Swatches on Archive / Products listing page
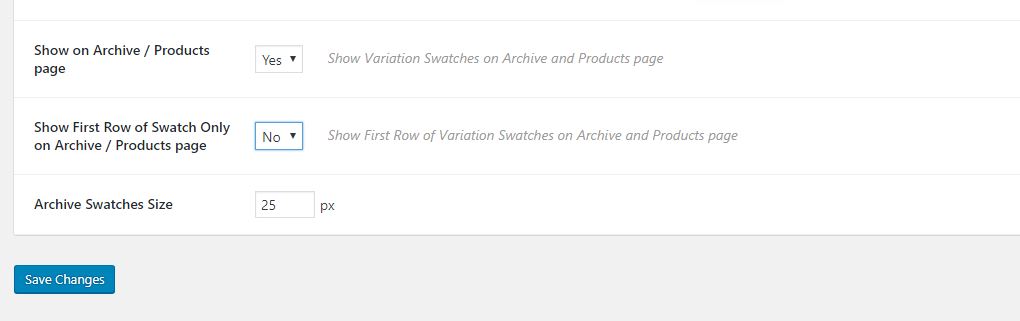
In addition, you will have the option to change the Archive Swatches Size as well as showing the first row of swatches only on archive / products listing page.
Support
Support, Knowledge Base and Forums
We provide fast and reliable support, for inquiry, troubleshooting, customization and special requests, please send an email via the contact form at https://codecanyon.net/user/highwarden
Be sure to follow us on Envato for new releases and future products here.
For knowledge base and forums you can visit the following links:


You can also follow us on social media sites
![]()
![]()
![]()
![]()
![]()